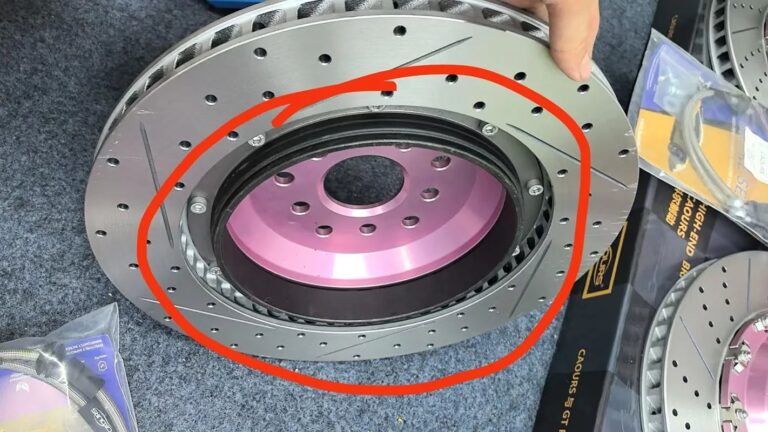
Buying a big brake kit starts with a fitment review, not a caliper color or a wheel-diameter label. This big brake kit measurement checklist shows the vehicle, wheel and rotor details to collect before requesting a quote. It helps a buyer identify what can be reviewed and, just as importantly, what still needs vehicle-specific confirmation.
Quick answer
A six-piston caliper or an 18-inch wheel is not enough information to confirm a big brake kit. Start with the exact vehicle year and configuration, then collect front-wheel diameter, width, offset, inner-barrel and spoke photos, current rotor dimensions, and the required front or rear position. A supplier or installer can then compare those inputs with the proposed kit’s drawing, template and component specification.
Why wheel diameter alone cannot confirm clearance
Wheel diameter describes only one boundary. The caliper must also clear the wheel’s inner barrel and the back of its spokes. Offset, wheel width, spoke shape, wheel weights, hub arrangement, a spacer and the specific rotor-and-bracket position can change the result. That is why two wheels marked with the same diameter can have different brake clearance.
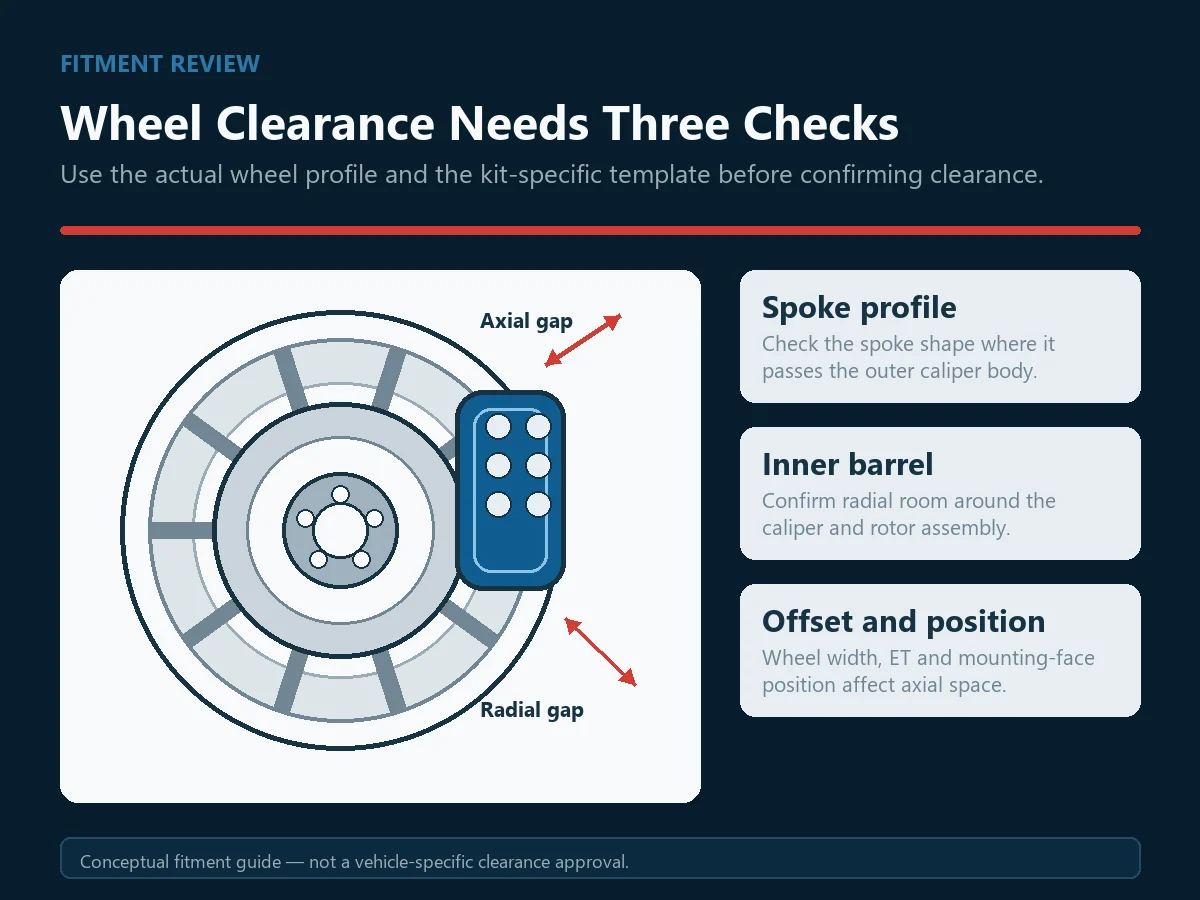
Inner barrel
The barrel must leave room around the outer caliper body. A diameter marking cannot show that internal shape.
Spoke face
Spokes may sweep inward toward the caliper. A straight-on wheel photo is less useful than a close side view of the spoke-to-barrel area.
Position on the hub
Offset, mounting face and any approved spacer alter where the wheel sits relative to the caliper. Treat them as fitment inputs, not assumptions.
The seven inputs to prepare before a brake-kit quote
Collect these inputs before choosing a disc size or paying for a custom configuration. They turn a vague fitment question into a reviewable request and reduce back-and-forth between the buyer, supplier and installer.
Year, model, trim and axle
State the exact vehicle model and year, which axle needs the kit, and any known factory brake option. These details distinguish similar-looking configurations.
VIN or factory brake evidence
Use the VIN or documented original-brake information to help identify the original configuration. It does not prove clearance with modified wheels.
Diameter, width and offset
Record the front-wheel diameter, width and ET/offset. Confirm whether the same wheel is used at both axles.
Inner-barrel and spoke photos
Take clear photos of the wheel’s inner barrel and spoke profile. A clearance template or dimensional drawing gives the installer a comparison point.
Current and required rotor data
Record the required diameter and any known thickness, hat offset, centre bore and bolt pattern. Do not select a diameter from appearance alone.
Disc style and caliper position
Identify the required front or rear position and the intended disc style from the relevant product images. A caliper name does not define a complete rotor package.
Installer and market
State who will inspect and install the kit, plus the destination market. The installer needs the final kit documents and must assess local requirements.
What to measure on the brake rotor before selecting a size
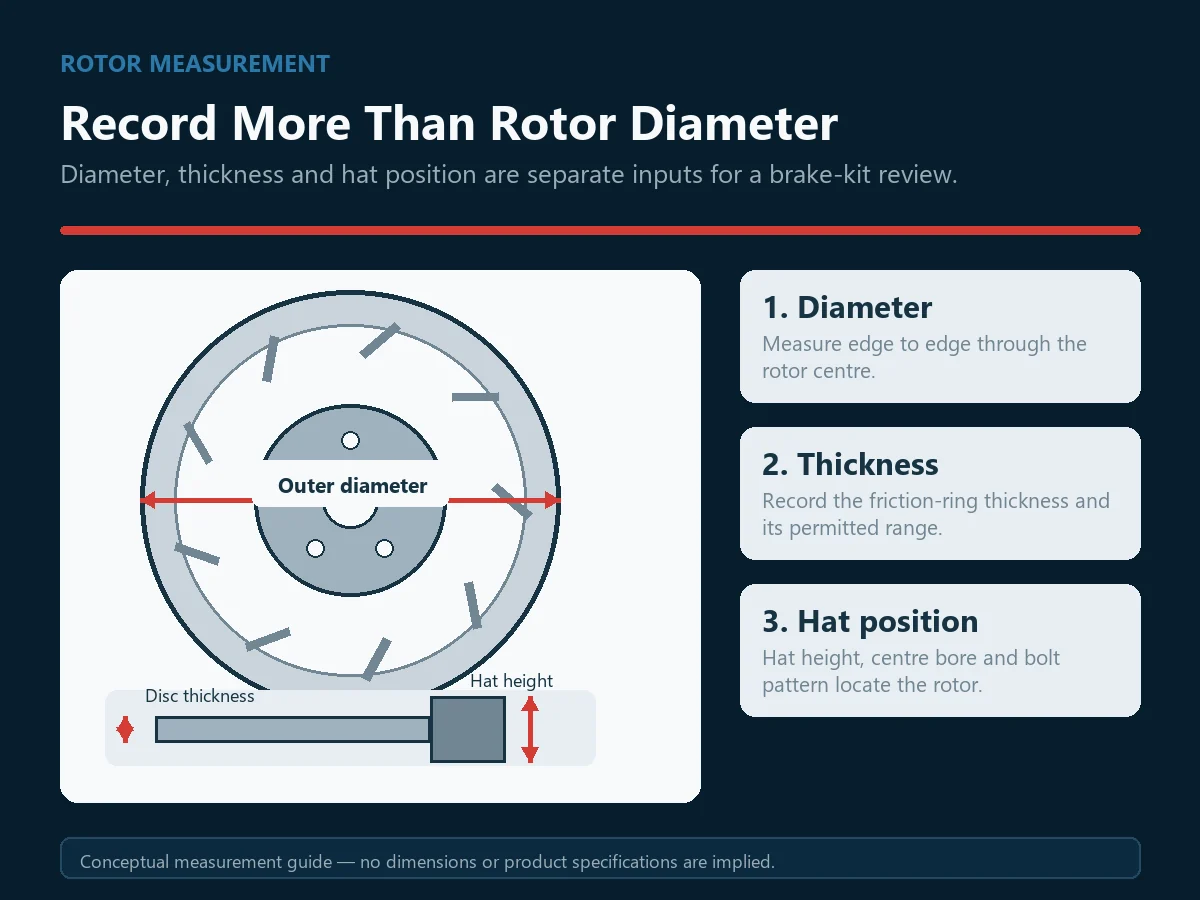
Rotor diameter is only one part of a brake-disc specification. The proposed caliper, bracket, rotor, hat and hub relationship must be evaluated as a system. If a value is unknown, mark it unknown rather than guessing; a correct review may require a drawing, an original part number or an installer measurement.
| Detail | Why it matters | What to send |
|---|---|---|
| Diameter | It sets the disc’s outer position, but does not establish thickness or hub position. | Current diameter and the requested diameter, such as 330 mm, 345 mm, 355 mm or 380 mm when that requirement is known. |
| Thickness | It must match the proposed caliper and pad-gap specification. | Measured thickness or the original part specification; do not infer it from diameter. |
| Hat height / offset | It positions the rotor relative to the hub, bracket and caliper centreline. | A drawing, original part number or installer measurement where available. |
| Centre bore and mounting | They affect how the rotor locates on the hub. | Hub/rotor photos and the confirmed bolt pattern or part reference where available. |
| Disc style | A product-image style selection is a visual preference, not a full dimensional specification. | The image style number together with the dimensional information above. |
How to measure brake rotor diameter and disc thickness
Searches for how to measure brake rotor diameter, how to measure brake disc size and brake disc thickness measurement describe related tasks, but the values should be recorded separately. Work on a safely supported vehicle and have a qualified installer take or verify safety-critical measurements. Use millimetres consistently and identify whether each value comes from a physical measurement, a manufacturer drawing or an original part reference.
Outer diameter
Record the full outside diameter across the rotor through its centre. Do not substitute the width of the swept friction path or estimate the diameter from the wheel opening.
Disc thickness
Use a suitable micrometer across the two friction faces and avoid the outer wear lip, deep grooves and visibly damaged areas. A worn measurement is not automatically the rotor’s original nominal specification.
Hat position
Record the drawing datum and measurement method for overall height or hat offset. Terminology can vary, so a number without its reference faces may be ambiguous.
Rotor measurement record to send with the inquiry
- Identify the measured rotor. State the vehicle, axle, current brake configuration and whether the rotor is original, replaced or part of an earlier conversion.
- Record the outside diameter. Measure edge to edge through the centre and label the value as the current rotor diameter, not the requested upgrade size.
- Record the friction-ring thickness. Note the measuring tool and whether wear, lips or grooves could affect the reading. Use the verified service specification when the nominal or minimum thickness is required.
- Document the mounting geometry. Add overall height or hat offset, centre bore, bolt count, PCD and mounting-face orientation when they are available from a reliable drawing or measurement.
- Separate current and proposed data. List the existing rotor measurements in one column and candidate sizes such as 330 mm, 345 mm, 355 mm or 380 mm in another. A candidate diameter still requires hub, bracket, caliper, wheel and hydraulic review.
- Attach evidence. Send clear photos of the rotor, hub and measuring setup together with the part reference or drawing. A photo without a visible scale should not be treated as a dimension.
Common rotor-measurement mistakes
Do not copy a rotor size from another vehicle, use wheel diameter as a substitute, treat a worn thickness reading as the nominal specification, or assume that a larger diameter will fit the existing bracket and caliper. If a measurement cannot be verified, mark it unknown and request an installer measurement or dimensional drawing.
What the VIN can help confirm, and what it cannot
A VIN can help a reviewer identify the original vehicle configuration when a reliable vehicle-data source is available. It cannot by itself confirm the clearance of aftermarket wheels, prior hub changes, non-original suspension parts or an unknown existing brake conversion. For those cases, keep the wheel, rotor and photo evidence in the request.
Useful for a review
Vehicle identity, model year, and possible original-equipment configuration checks when supported by the available records.
Not a clearance guarantee
Spoke clearance, barrel clearance, an aftermarket wheel’s offset, rotor position, brake balance, pedal feel or local road-use compliance.
Big brake kit measurement checklist: the order of review
Use this sequence before an order is released. It keeps visual choices and commercial details separate from the safety-critical technical review.
- Identify the vehicle. Send the model, year, trim, axle and VIN or original-brake evidence. Note any non-original suspension, hub or brake changes.
- Document the wheels. Send front-wheel diameter, width, ET/offset and close photos of the inner barrel and spoke profile. Mention any spacer already fitted.
- Record rotor facts. State current and required disc diameter, plus thickness, offset and mounting information when known. Include the required disc style separately.
- Compare kit documents. Ask for the proposed kit’s component list, drawing or clearance template. Print a template only at its stated scale, verify the print scale before use, and compare the specific kit with the actual wheel.
- Confirm the written quotation. Ensure the final quotation identifies the axle, component set, disc size, disc style and any unresolved fitment item before payment or packing.
- Inspect before installation. Compare delivered components with the approved quotation and installation documentation. Follow the kit maker’s instructions and the installer’s checks.
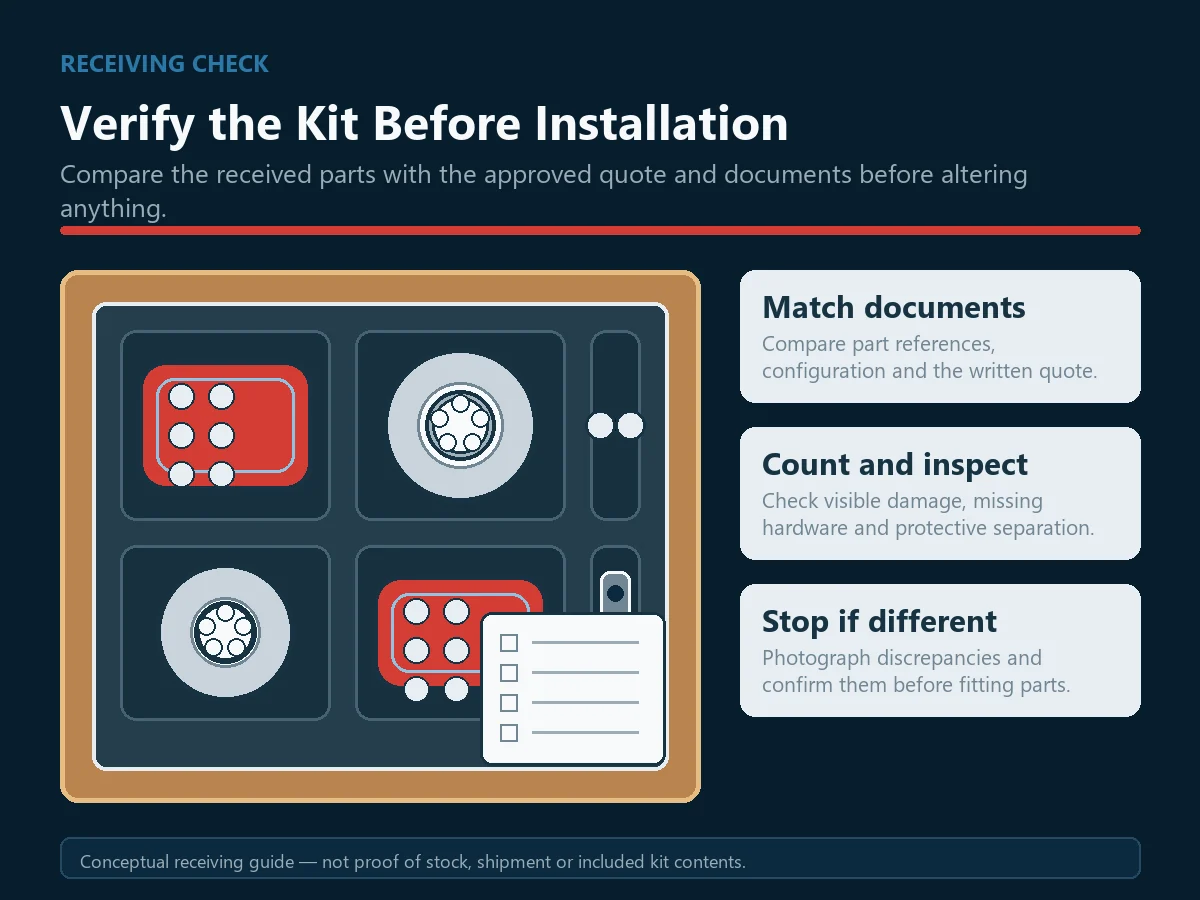
Separate a component quote from a completed fitment decision
A quote can identify the requested kit configuration, but it should not silently turn missing measurements into a fitment promise. Use the table below to keep the decision transparent.
| Status | Example | Buyer action |
|---|---|---|
| Confirmed in writing | Requested axle, disc-size requirement, disc style and the proposed component list are written in the quotation. | Compare it with the request and ask about any mismatch before payment. |
| Needs technical review | Wheel clearance, rotor offset, bracket position, hose routing and existing modifications. | Provide the requested photos, measurements and installer input; do not treat a generic product image as confirmation. |
| Outside a supplier claim | Final installation quality, hydraulic behaviour, road-use legality and inspection acceptance. | Use a qualified local installer and the applicable vehicle, kit and local requirements. |
Make your brake inquiry ready for review
Start with the vehicle, wheel, disc and axle details above. On the inquiry form, select the required brake-disc size and disc style, then add the wheel information and photos in the message or supporting communication. You can also compare complete big brake kit routes after the measurement record is ready. The goal is a reviewable request, not a universal compatibility claim.
Submit Vehicle Details for a Fitment ReviewFrequently asked questions
Will a six-piston big brake kit fit every 18-inch wheel?
What wheel details should I send before ordering?
Is wheel diameter enough to confirm caliper clearance?
How do I choose the required brake-disc size?
Can the same six-piston caliper use different rotor sizes?
Why are vehicle year, VIN and brake photos requested?
Can I install a big brake kit myself?
What should be checked when the kit arrives?
References and Sources
- Essex Parts, How to Check Big Brake Kit Wheel Clearance (evergreen technical reference, opened 2026-07-25): used for the principle of using the template for the specific kit and checking the real wheel; its own clearance figure is not applied as a universal rule here.
- Brembo Parts, Indications and Bedding In (public page dated 2026-06-09 in the research snapshot): used for the boundary that a measurement guide is not an installation or performance certification.
- Wilwood data sheet (evergreen technical reference, opened 2026-07-25): an example of product-specific component documentation; it is not a fitment approval for another kit or vehicle.
Business or Service Introduction
SteedLuxParts provides a vehicle and brake inquiry route for buyers requesting a brake-kit quotation. The form asks for vehicle model and year, VIN or chassis number, wheel size, required disc size, disc style and axle position so the request can include the information needed for a fitment review.
Contact Details
Send the vehicle, wheel and brake details through the verified SteedLuxParts contact route. Include your target brake-disc size and product-image style only after the fitment inputs are listed.
Open the Vehicle and Brake Inquiry Form