A Land Cruiser 70 brake upgrade should start with a fitment record, not a piston count or a wheel-diameter promise. The exact vehicle, original brake system, axle scope, wheel geometry, rotor and hub measurements, and hydraulic or parking-brake requirements all affect the review. This guide shows what to confirm before requesting a candidate configuration or written quote.
Plan the system before choosing the hardware
A VIN or chassis number can identify a baseline Land Cruiser 70, but it cannot prove the current wheel geometry, previous brake conversions, spoke clearance, hub measurements, or rear parking-brake controls. Treat front, rear and full-system work as different projects, then verify the required evidence with a qualified installer and the supplier before ordering.
Choose the upgrade scope first
The phrase “brake upgrade” can refer to several different jobs. A buyer replacing wear parts around an original-size rotor is not asking the same engineering question as a buyer changing calipers, rotor diameter, hydraulic balance or the rear parking-brake system. Define the axle and objective before comparing kits.
| Planning path | Primary evidence | Do not assume |
|---|---|---|
| Original-size service parts | Exact axle, installed caliper, rotor dimensions and catalog references | A shared model name means identical brakes |
| Front caliper and rotor change | Wheel template, hub and rotor data, caliper envelope, bracket and hose drawings | An 18-inch wheel automatically clears the caliper |
| Rear service-brake change | Rear axle, hub, rotor, hose, mounting and parking-brake arrangement | Front-kit logic transfers to the rear axle |
| Rear EPB integration | Actuator, controller, wiring, voltage, release method and diagnostic scope | Direct ECU or CAN connection, Auto Hold or no coding |
Build a vehicle and original-brake record
Start with the full model designation, production year, sales market, VIN or chassis, engine, drivetrain, axle position and left- or right-hand-drive configuration. Add clear photos of the current caliper, rotor, hub, brake hose routing and wheel interior. Record any previous suspension, hub, axle, wheel or brake changes.
Original-brake evidence matters because a model family can contain multiple configurations, and an older vehicle may no longer match its factory build. The record should describe what is physically installed now, not only what a catalog suggests should be present.
- Model, year, market and chassis or VIN
- Front, rear or full-system scope
- Current caliper and rotor photos
- Known hub, axle or suspension changes
- Wheel brand, model, diameter, width and ET
- Installer contact and destination market
Land Cruiser 70 brake upgrade: why wheel diameter cannot confirm clearance
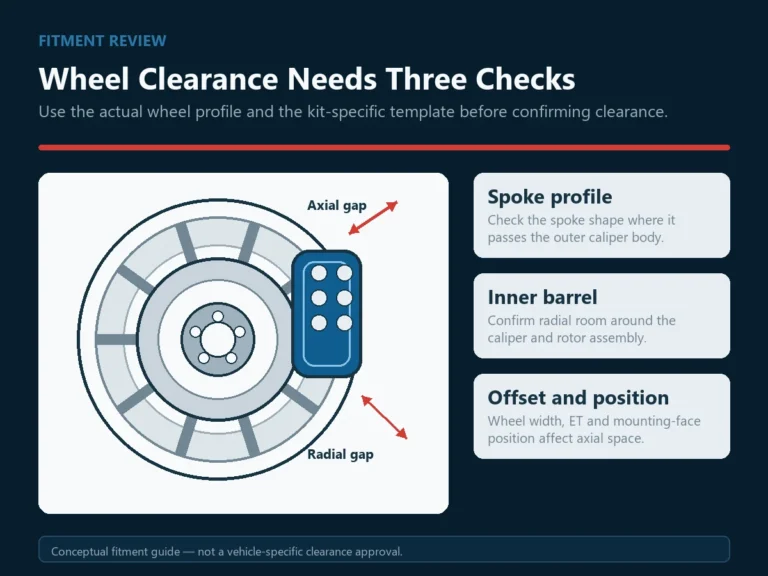
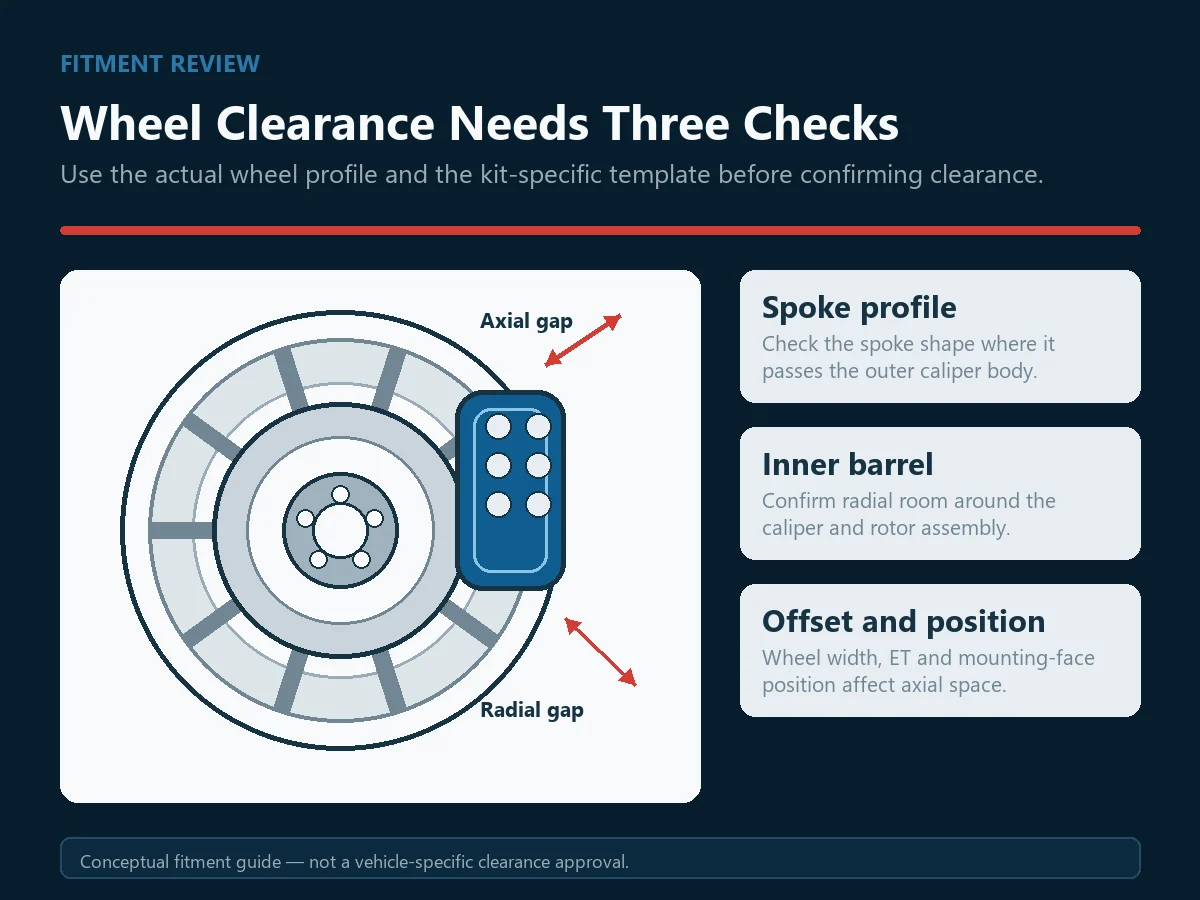
Nominal diameter tells you only part of the available space. Radial clearance depends on the inner barrel and wheel-weight position. Axial clearance depends on the spoke profile, mounting-face position, width, ET and the caliper envelope. Two wheels with the same diameter and offset can still have different spoke shapes.
Use a one-to-one clearance template for the candidate kit when it is available. Print it at verified scale, place it against the actual wheel mounting face, and check the barrel and spoke zones. Share photos with a ruler or scale. Do not solve interference by grinding components or adding an unreviewed spacer.
Record rotor and hub geometry as separate fields
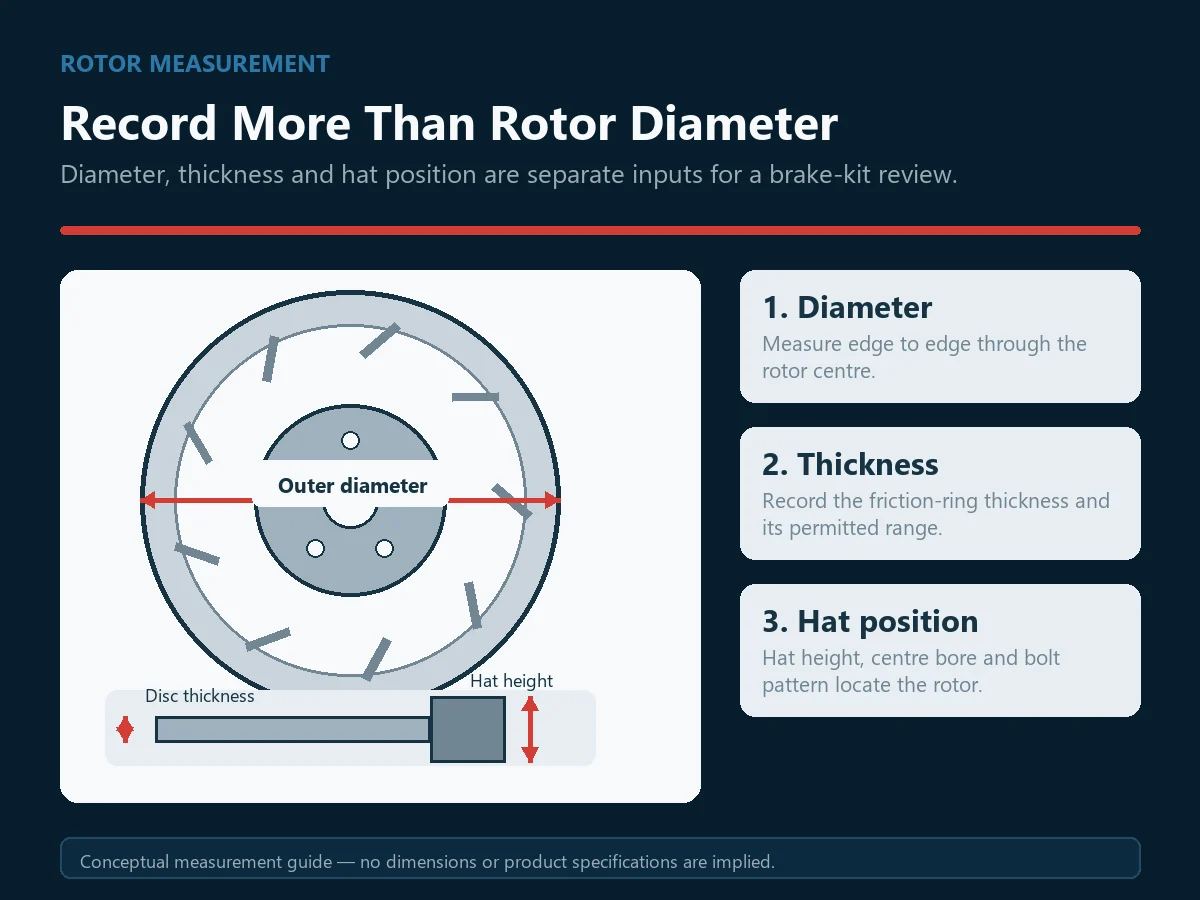
A useful rotor record separates outer diameter, friction-ring thickness, overall height or hat offset, pitch circle diameter, bolt count, center bore and hub pilot. The supplier may also need the mounting-face orientation, usable annulus, current runout information and photos showing how the rotor locates on the hub.
Do not select a rotor only because its diameter fits inside a wheel. The rotor must also match the caliper’s supported thickness and pad path, align with the bracket and hub, and leave appropriate clearance. A product-specific drawing controls this decision; a generic size table does not.
Hydraulics and brake balance require engineering review
Caliper piston area, master-cylinder bore and stroke, booster characteristics, pedal travel, proportioning or load-sensing hardware, and front-to-rear balance belong in the same review. ABS and ESC hardware or software variants may also matter. A larger rotor or more pistons does not establish that the original master cylinder will work correctly.
Ask the supplier and installer what calculations, drawings and tests support the exact configuration. After professional installation, the check normally includes caliper centering, rotor runout, fastener torque, hose routing, bleeding, leaks, pedal feel and warning-light behavior. This article is a planning guide, not vehicle-specific installation instructions.
Keep rear EPB integration separate from the service brake
An electric parking-brake proposal needs a written system boundary. Identify the actuator voltage, controller, connector, wiring harness, switch logic, manual release, diagnostic path and parking-hold requirement. Clarify whether any ECU or CAN communication, Auto Hold function or coding is inside or outside the proposed scope.
Do not describe a rear EPB option as plug and play until those interfaces are documented and tested on the exact vehicle. Destination-market inspection, registration, insurance and road-use requirements remain separate from component or workshop documentation and should be checked locally before installation.
Control the order with a written BOM and receiving check
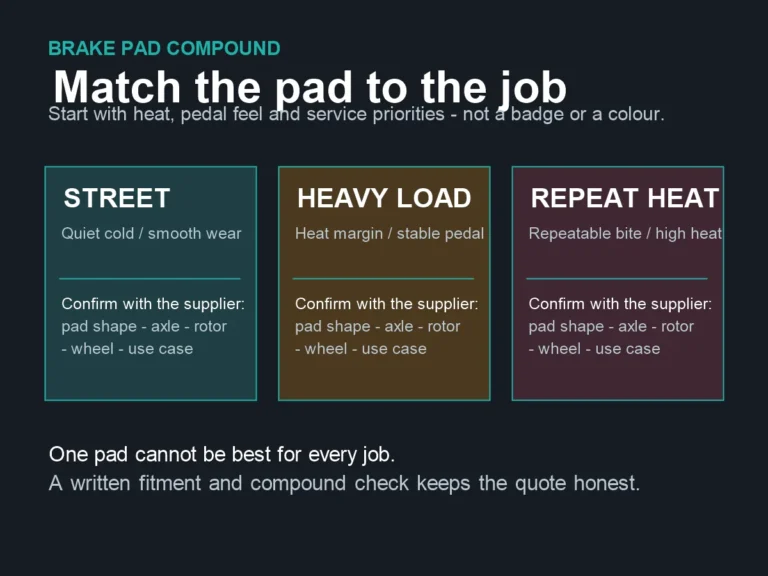
The final quotation should list each part and quantity rather than relying on a product photo. Separate calipers, pads, rotor rings or one-piece rotors, hats, brackets, hoses, fasteners, adapters, sensors and service references. Mark anything optional, excluded or still subject to review.
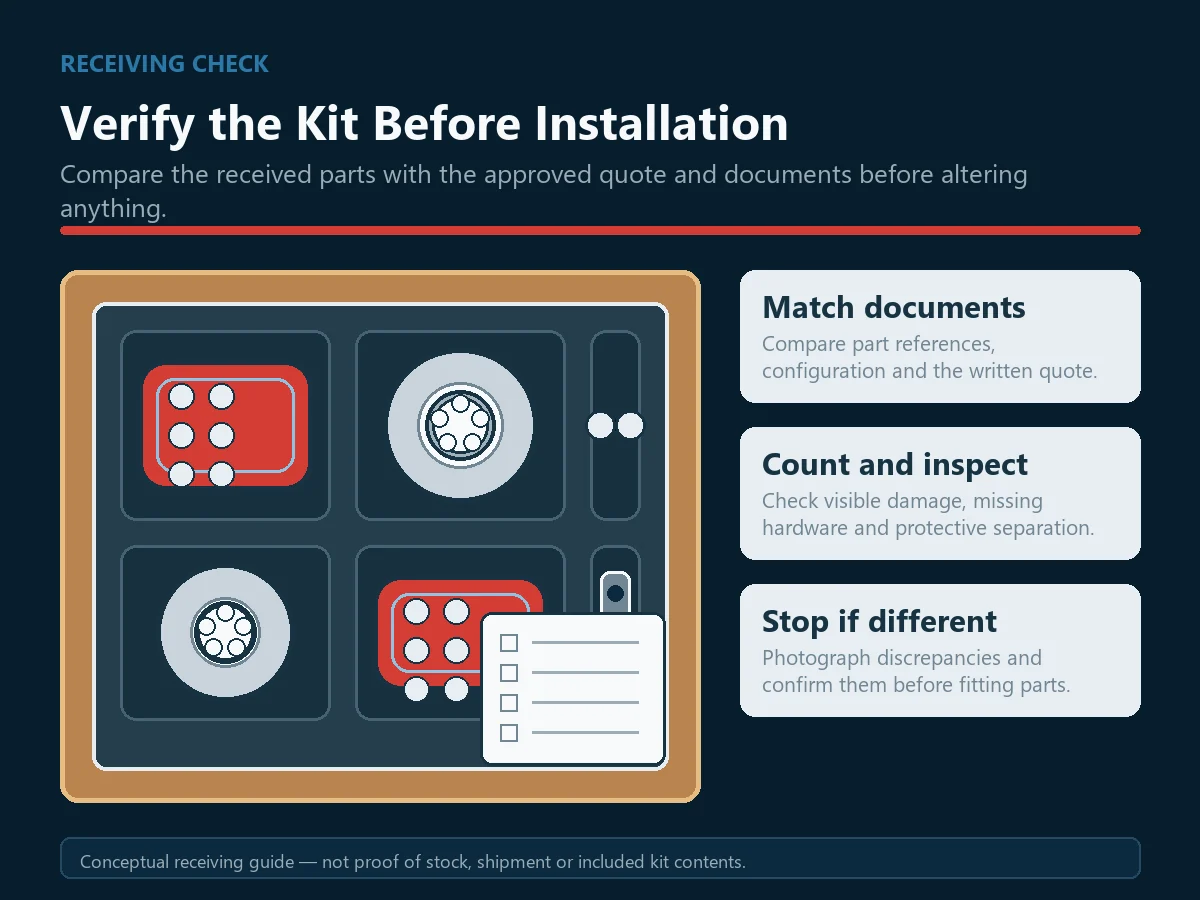
When the shipment arrives, compare labels and quantities with the approved quotation before fitting or modifying a part. Inspect packaging and visible damage, then confirm that left- and right-hand components, bleeder positions, hose fittings, brackets and hardware match the written record. Stop when the documentation and physical parts disagree.
Prepare a quote-ready enquiry
A complete enquiry reduces guesswork and makes exclusions visible. Send the vehicle record, original-brake photos, axle scope, wheel data, clearance template or measurements, rotor and hub data, destination country, buyer type and required delivery window. For workshop, fleet, importer or distributor requests, add quantity and the required packaging or documentation.
Ask for a reviewed candidate configuration, written BOM, included and excluded items, service references and the evidence needed before production. Price, MOQ, lead time, packaging, warranty, freight and duties should follow the written quotation; they are not inferred in this guide.
Frequently asked questions
Is a VIN enough to confirm a Land Cruiser 70 brake upgrade?
No. A VIN or chassis can identify a baseline vehicle, but it does not prove the current wheels, spoke clearance, hub dimensions, previous conversions or installed brake version. Pair it with current photos, measurements and modification history before a supplier or installer reviews a candidate configuration.
Does an 18-inch wheel guarantee caliper clearance?
No. Wheel diameter is only a screening input. Width, ET, mounting-face position, inner-barrel profile, spoke shape and the kit-specific caliper envelope determine radial and axial clearance. Use the actual wheel and a verified one-to-one template when available.
Which rotor and hub measurements matter?
Record rotor diameter, thickness, overall height or hat offset, PCD, bolt count, center bore and hub pilot. Depending on the proposal, the supplier may also need mounting-face orientation, annulus dimensions, runout information and clear photos with a scale.
Can a rear EPB caliper connect directly to the vehicle?
Do not assume it can. The actuator, voltage, controller, harness, switch logic, manual release, diagnostics and any ECU or CAN functions need an exact-vehicle review. Auto Hold, coding and warning-light behavior must be defined rather than implied.
Will the stock master cylinder, ABS or ESC still work?
That cannot be confirmed from piston count or rotor diameter. Master-cylinder capacity, booster behavior, piston area, pedal travel, brake balance and the installed ABS or ESC variant require engineering review and exact-vehicle verification.
What should a written quotation and BOM contain?
It should identify each component, quantity, configuration, included hardware, optional items, exclusions and service references. Commercial fields such as price, MOQ, lead time, packaging, warranty and freight should also be stated in writing when they have been confirmed.
Who confirms installation and local road-use requirements?
A qualified installer must confirm the physical installation and post-installation checks. The buyer should also verify destination-market inspection, registration, insurance and road-use requirements. A supplier drawing, component certificate or product description does not automatically establish installed-vehicle legality.
References and sources
- Essex Parts: How to Check Big Brake Kit Wheel Clearance. Evergreen technical reference for using a kit-specific template with the actual wheel.
- Wilwood product data-sheet example. Evergreen reference showing why caliper and rotor decisions need product-specific drawings; it is not LC70 fitment evidence.
- Bendix: LandCruiser brake booster installation article. Reopened 2026-07-30 as a competitor and system-scope reference; its product claims do not transfer to another kit.
Business and Service Introduction
SteedLux Parts supports retail, workshop and wholesale buyers with aftermarket brake sourcing and fitment-review communication. Candidate configurations remain subject to the vehicle, original-brake, wheel, rotor, hub, EPB and hydraulic evidence described above.
Contact Details
Include the VIN or chassis, current brake photos, wheel specifications, rotor and hub measurements, axle scope, destination country and buyer type.
Request a Land Cruiser 70 Fitment Review